Vagabond

From City of Heroes: Rebirth Wiki
Jump to navigation Jump to search
This article is about the contact Vagabond. For the Invention badge, see Vagabond Badge.

Overview

Vagabond
Vagabond.jpg
Ex-Soldier
Zone Underground Imperial
Coordinates (-851, 336, -3378)
Level Range 8-15
Introduced By == Level 8 ==
Beholder
Introduces == Level 8 ==
Wardog
Enemy Groups Badge DefeatPPD.png Praetorian Police Department
Badge DefeatClockwork.png Praetorian Clockwork
Badge DefeatSyndicate.png Syndicate
v  d  e

Vagabond is a Praetorian contact in Underground Imperial at coordinates (-851, 335, -3378).  His level range is 8-15.

Introductions

Contact Introduced By

Contact Introduces

You ready to meet Wardog, Character?

Wardog has been fightin' this war for a long time. He never speaks about his past, though. Maybe that'll change with you, who knows?

Wardog is the head of our cell here in Imperial, he's got everything mapped out from beginning to end.

Information

Ex-Soldier

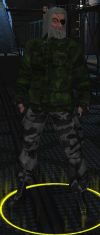
Vagabond is, perhaps, one of the most experienced fighters in all of the Resistance. He was part of the Italian army and fought bravely against Hamidon when the creature attacked his nation. Vagabond traveled the entire world, fighting every fight possible, before joining the Resistance.

Prior to Introduction

You've got me mistaken with someone else, kiddo. I ain't the person you're looking for. Why don't you go talk with a contact you already know rather than bothering an old war vet.

Initial Contact

Ciao there kiddo. Beholder told me all about you. She's a good kid, little on the hogwash side, but that's how all kids her age are. I've been all over the world, seen everything it has to offer. And kiddo, let me tell you, the world is just about tapped out on good stuff to offer. That's why I'm shacked up here with these folks and that Scott fella. We're the last good thing left in this world, but we gotta do a lotta bad things to make sure that's true. Every good soldier knows that, just a matter of how many soldiers are willing to do it. How about you?

Greeting

Let's see what a washed up old vet and a guy / girl with super powers can really do.

Too Busy

How do you expect to stick it to Tyrant if you're puttering around with other people's chores? Get those done and then come back to me!

Too Low Level

None

No More Missions

Any minute that devil Tyrant is gonna hightail it and run after all we've done to him. For now, we wait. I'll let you know if I have any other orders for you.

Store

Story Arc

The Price Good Men Must Pay

E ICON MeritToken.png Merit Rewards: This activity awards 2 Reward Merits.

Souvenir

Vagabond's Bullet Casing

Vagabond gave you this old bullet casing. He has no use for it now, but he figured it would be a good memento for you to have of the time you served. You call that time...

The Price Good Men Must Pay

It all began with an assault on the BAF to free soldiers of the Resistance. You discovered that Neuron infected them with some sort of disease. It would have been a new method of biological attack; the intent was that the soldiers would infect members of the Resistance with the disease and slowly whittle down their numbers.

Vagabond was upset at this, but only because he didn't know how to use this to the advantage of the Resistance. You went to find a man named Matherson who was supposed to know where you could find more details on the disease. Matherson refused to talk, so you were forced to kidnap his family to make him talk. Along with Wardog, you proved to Matherson that his brother and sister were in danger. Matherson easily told you everything you needed to know, but was then shot by Wardog.

You, Hatchet, and Vagabond assaulted the lab that Matherson told you about, discovering the notes from Neuron on the disease. You weren't quite sure what it all meant, but Wardog seemed to insist that it would help in his grand project.

Part One: No Man Left Behind

Briefing

I wanna let you know, kiddo, that I ain't callin' you kiddo out of disrespect. It's 'cause I never remember anyone's name anymore, 'cept for folks I served with for a long time. Like that Behold whatever kiddo there, I ain't gonna be rememberin' her name. So I'm gettin' that out of the way so you and me can serve together without any problems.

So, first things first. You went and got us those blueprints for the Behavioral Adjustment Facility. Me and Wardog, we've got a plan to break out a bunch of our boys from there. You see, kiddo, Cole touts the BAF as the place where folks get 'rehabilitated' or some other nonsense. He's sittin' on a pile of hogwash, that's what he is. The BAF ain't nothing but a facility where his scientists perform whatever experiments they want!

Kiddo, we're gonna go rescue our boys that're in there. And every single one of 'em is gonna help us blow Cole and his regime to bits! You in?

  • I'm in.

Great! Get topside and talk to one of our girls, name's Elana. She'll getcha all set up to get into the BAF. Now I gotta warn ya kiddo, the BAF is a dangerous place. We can getcha in there, but you'll have to move fast. Your main priority is to save at least three of our boys. I wanna have ya save the others, kiddo, but that might put ya at risk. And I'm gonna be honest kiddo, you're one of our big hitters, so we ain't riskin' you.

Unnecessary Solicitation

You talk with Wardog yet, kiddo?

Contact Small Elana.jpg
Elana

Briefing

You're part of the attack in the BAF, right? We've got a temporary passage going into there now. Are you ready?

  • I'm ready. (Start Mission)


Mission Objective(s)

Map: BAF_PRISON

Wardog calls out for you to hurry. There's only so much time before Cole's Guard will arrive.

  • Break into the BAF
    • 3 soldiers to recover
    • 34 soldiers to recover
    • Rescue as many Resistance as you can in five minutes

You recovered as many soldiers as you could from the BAF.

EdLetter.png Editor's Note:

After recovering the third soldier, a five-minute countdown will commence, during which you rescue as many of the 34 soldiers as possible. Most, if not all, are held in the prison area of the map.

Enemies

Badge DefeatPPD.png Praetorian Police Department
Badge DefeatClockwork.png Praetorian Clockwork

Notable NPCs


Captured Fighter Dialogue 

Before Combat:

Captured Fighter: Uhhh...
PPD Suppressor: How can we tell if it's working?

Combat Start:

Captured Fighter: You... you're here for me?
PPD Suppressor: Powers Division? Wait, are you with the Resistance?

Upon Rescue:

Captured Fighter: They... did something to me...

Before Combat:

Captured Fighter: Can't... see too well...
PPD Trooper: It looks like the chemicals are kicking in.

Combat Start:

Captured Fighter: Who... who are you?
PPD Trooper: No one is allowed in here!

Upon Rescue:

Captured Fighter: Am I really... going home?

Before Combat:

Captured Fighter: My body feels... strange...
Sweeper: Good, that means everything is working properly.

Combat Start:

Captured Fighter: What's... happening?
Sweeper: No outsiders allowed, not even Powers Division!

Upon Rescue:

Captured Fighter: Where am I going to go now?

Extra Fighters - Upon Rescue:

Captured Fighter: Thanks!

You've saved one of the soldiers!

Icon clue generic.png
Experiments in the BAF
One of the soldiers you rescued mentioned that there were some experiments done on him. He mentioned under his breath that the experiments were intended to 'Show the Resistance who holds the power here'.

Debriefing

Agh, of all the hogwash that's happened, this is it! Sorry, kiddo, just somethin' I found out. We saw that those boys you picked up were full of somethin' bad. It's a terrible thing, I tell ya, terrible thing. We knew those scientists would do something to them. That's the whole reason why we wanted to get 'em outta the BAF! We were hopin' they were gonna be transformed into some sorta super soldier that the PPD were gonna use. But those scientists were one step ahead of us. They set our boys up to be a walkin' ball of disease, waiting to spread whatever sick virus those scientists put in them!

But kiddo, it's gonna be okay. When you're in a war, you gotta adapt to the situation. We may have walking diseases quarantined here now, but there's a way for us to use every single one of 'em for the war effort. Just you wait.

Part Two: The Diseased Source

Briefing

Kiddo, all of us down here have been tryin' to figure out the source of this disease. Best we can figure out is that it was done by Neuron, or at least one of his scientists. You never know with that guy, bein' that he's a super intelligent speedster who can have ten projects goin' on at once. I'm not gonna sit around and let those men waste away and die. That ain't a way for a soldier to go out, you hear me? If I could, I'd take their place, but we need someone like me for Wardog's project. You and me, kiddo, we're gonna make sure our boys get to deliver some justice.

  • We'll need more information to do that.

You're right on that one, kiddo. I think I know where we can find that. There's a storage warehouse in Imperial; it's used by them Loyalists to keep Clockwork clean and also to move around chemicals. There's a PPD chief that's assigned there regularly, guy by the name of Interrogator Matherson. Here's our plan of attack.

You're gonna pound him to the ground to get information on Neuron's project, while also crackin' open anything you find in there to see what we can figure out. Meantime, I'll be down here taking stock on our boys and makin' sure they don't go dyin' before we can use 'em.

Find Matherson

Unnecessary Solicitation

Find Matherson.

Mission Objective(s)

Map: N_Warehouse_30_Layout_01_04

The sound of Clockwork walking about fills the area.

  • Find Matherson
    • Look for information on Neuron's project
    • Put down Interrogator Matherson

Matherson refused to talk, forcing you to take him back as your prisoner.

Enemies

Badge DefeatClockwork.png Praetorian Clockwork
Badge DefeatPPD.png Praetorian Police Department

Notable NPCs


Clockwork Dialogue 

Before Combat:

Sweeper: PRA + !RES.ALV = PRA.SAF

Combat Start:

Sweeper: PRA + RES.ALV = PRA.!SAF

Before Combat:

Cleaner: Need to figure out...
Sweeper: ...just what the Resistance are planning...

Combat Start:

Cleaner: You, again! Perhaps you aren't dealing with my Penelope after all...

Combat Start:

Cleaner: While PPL.ATK.CWK; CWK.TSK.DEF.CWK > CWK.TSK.CLN.PRA

You found some information on the project.

Icon clue generic.png
Experimental Chemicals
You found some chemicals that are from Neuron's labs in Neutropolis. None of them stand out as being terribly useful, though it couldn't hurt to bring them back to the Resistance.


Interrogator Matherson Dialogue 

Before Combat:

Interrogator Matherson: Everything seems to be in order here...

Combat Start:

Interrogator Matherson: What? What is Powers Division doing here? This is off limits!

Matherson refused to tell you any information on the project.

Icon clue generic.png
Matherson's Refusal
Matherson refused to talk, even after you delivered a sound beating to him. It looks like you'll have to do this the hard way - by taking him prisoner.
Deliver Matherson to Wardog

Unnecessary Solicitation

Kiddo, you got a good haul in there! Wardog would be interested in seein' this.

Mission Objective(s)

  • Deliver Matherson to Wardog

Contact Small Wardog.jpg
Wardog

Briefing

So, another one of the PPD in our clutches? I'll take good care of Matherson, Character. I remember his brother very well, back in the academy. I believe I know just the thing that will get him to tell us everything he knows.


Debriefing

Kiddo, I gotta say, I've seen cold before, but Wardog always seems to hogwash the cold that I thought I've seen. I watched him drag that Matherson fella away and tell me to be ready to move. Thing is though, Wardog ain't the coldest thing I ever saw. You wanna know what was the worst? I'll tell ya. It was back in Rome, you know, before it was destroyed. I was servin' in the Italian militia, we were holdin' out against hordes of Devouring Earth. It was the third or fourth time in my life that I was pretty sure I was gonna die.

I was laying in a pile of debris, watchin' the Devouring Earth charge into the main city. And you know who I see, watchin' the entire scene from a skyscraper?

Cole. I thought we were all saved! Here was that guy everyone was talkin' about. And you know what he did? He watched Rome burn. When all hope was just about lost, he swooped in there, like some sorta hero. He saved everyone else who was left, but of course, the Devouring Earth destroyed whatever was left of Rome's government, meanin' big bad Cole had no competition.

Me? I survived, 'course, but that's another story. We got bigger fish to fry now.

Part Three: Closest to the Heart

Briefing

Men have to do a lotta bad things in war, kiddo. It ain't that we want to do it, but it's that we gotta. It's what makes us different from the Wardens. Why, back when I served in Italy, we had to let one of the smaller villages get devoured by Hamidon, just so we could establish a better base over in Milan. It's what had to be done. But some fools went out themselves to try to save that village, only to go get killed. Now what good is that gonna do?

I tell ya this because we gotta do something real bad to do somethin' real good, but I don't think you're gonna have a problem with it. Matherson isn't talkin' about where we can find the info on what our boys have, so we gotta take drastic actions.

  • What sort of actions?

Family actions, kiddo. We're gonna kidnap Matherson's brother and sister and do the whole threaten routine. If Matherson knows what's best for them, he'll talk.

Wardog has their location; turns out they've got connections with the Syndicate. Unfortunately for us, they happen to be members of the Syndicate who aren't workin' for us. That's your cue, kiddo, to go wipe the floor with a ton of them suits in order to get us that man's family. We got a small part of the tunnels you can bring 'em to. When you get there, radio in to Wardog and we'll get our little deal going.

Kidnap Matherson's Family

Unnecessary Solicitation

Don't feel bad, kiddo. This has gotta be done.

Mission Objective(s)

Map: P_Office_30_Layout_02_01

The Syndicate appears to have Matherson's family well guarded.

  • Kidnap Matherson's Family
    • Kidnap Matherson's Brother
    • Kidnap Matherson's Sister

You've kidnapped the Mathersons!

Enemies

Badge DefeatSyndicate.png Syndicate

Notable NPCs

  • Matherson's Sister (non-escort hostage)
  • Matherson's Brother (non-escort hostage)
  • (Syndicate Sword Master) (Boss) (One guarding each NPC)


Matherson's Family Dialogue 

Before Combat:

Matherson's Brother: Thanks for taking us in. Do you think we can find where my brother is?
Brawler Adept: We think the Resistance has him. We'll see what we can do.

Combat Start:

Matherson's Brother: Stay away!
Brawler Adept: Stand back, we'll handle this!

Upon Capture:

Matherson's Brother: Get off of me!

Before Combat:

Matherson's Sister: I hope John is OK... you'll really help us for free?
Brawler Adept: Some of us in the Syndicate still believe in honor. We won't work with those dogs in the Resistance, no matter what.

Combat Start:

Matherson's Sister: Leave us alone!
Brawler Adept: Get back, we'll handle this situation!

Upon Capture:

Matherson's Sister: If John were here, he would stop you!


Make the deal with Matherson
The Mathersons

Unnecessary Solicitation

You got the family, kiddo? Let's make this thing fast.

Mission Objective(s)

Map: TUNNELS_HOSTAGE

Everything is all set. Now to just radio in to Wardog.

  • Make the deal with Matherson
    • Use the radio to contact Wardog
    • Leave or activate the bombs

You've settled matters with the Mathersons. Time to move forward with the next part of the plan.

Contact Small Radio.jpg
Radio

Briefing

Character, good to hear from you. I have Matherson listening in. He doesn't believe that we have his siblings. He should know, however, that we are always serious when it comes to family. Do me a favor and get one of them to say a little something.

  • (Turn and get one of the siblings to speak up)


Matherson's Brother Dialogue 

Matherson's Brother: W-we're alive, John! Please, just give them whatever they want!


You can hear Matherson plead in the background.

It looks like Matherson is starting to get the idea. I wonder if he knows that we have the area rigged with explosives? It's no issue for us to let it blow. Even if Beholder can't read Matherson's mind, I'm sure we can use this as an example. What do you think, Character?

  • It seems easy enough to me. Maybe Matherson should just give us the information.

You can hear Matherson break down as he begins to reveal everything about where you can find information on Neuron's project.

See, that wasn't that hard, was it? This is a good lesson to learn. All men, even the most corrupt, are tied to their family. Thank you, Matherson, for giving us this information.

You hear the sound of a gunshot, followed by a body slumping to the ground. Wardog comes back over the phone.

Character, kill them and meet back with Vagabond. We have the information needed to bring justice to our men.

  • Roger.

Arming the bombs starts a timer at 0:05 to leave the mission.


Debriefing

Wardog is busy holding some sort of funeral for Matherson. I gotta tell ya kiddo, out of everyone I've met, Wardog is the one that makes me the most confused. He'll shoot the guy and order his family to be killed, then give him a funeral? Weirdest funeral I've ever been to, I'll tell ya that. But we got what we needed, which is the location of the lab where we can find the info that our boys need.

I think you can see what's gonna happen next; we're gonna have ourselves a good old fashioned raid!

Part Four: The Great Assault

Briefing

Here's the plan, kiddo. You, me, and Hatchet are gonna storm the lab that Matherson blabbed about. We gotta do three things. First, we gotta get any information we can about the sickness our boys have. Second, we gotta destroy these devices they got in the lab, they use 'em to call in for reinforcements - we ain't gettin' outta there alive if we don't do that. Lastly, we gotta take down a guy named Interrogator Crichton. Sounds simple enough, eh?

  • As long as nothing goes wrong.

Trust me, the three of us workin' together, nothin'll go wrong! This will just be like that time I served up in Canada with some of them mounties. They sure did put up a good fight against some of Hamidon's monsters, I'll tell you that much. But we can go over old war stories later on, eh? We'll meet ya at the lab!

Those Loyalists who have gone undercover would do well to speak with Provost Marchand about events that are happening.

Unnecessary Solicitation

Don't just sit around, we gotta get movin' kiddo!

Contacting Provost Marchand 

Briefing

Character, what's going on? There's a mess about the BAF and Neuron is refusing to acknowledge any of my questions.

  • Marchand, do you know about the experiments in the BAF?

Experiments? What experiments? The BAF is not used in that sort of way. It's a facility where we can change those who try to destroy Praetoria. A place for redemption, Character.

  • That isn't what Neuron is using them for. (Explain the situation)

Hrm... This is disturbing, to say the least. And again, paints us into a corner. You can't exactly turn on those two fellows of yours, not now. As well, I'm curious about this plan that this man, Wardog, has. Alright, here is my proposal, Character. Obviously Neuron is up to something. When you find the details on his plans, send them to me. We won't be able to stop the Resistance from using them, but I believe this entire mess was caused by Neuron's mad experiments. If I can have definitive proof, I can make a move against him.

  • I'll do what I can.
Icon clue generic.png
Marchand's Orders
Marchand requested that you go along with Vagabond and Hatchet, but that you send him the information on Neuron's plans when you retrieve them.


Mission Objective(s)

Map: P_TECH_POWER_45_LAYOUT_02_01

Vagabond cocks his gun, while Hatchet grins. Both seem to be ready for a fight.

  • Assault the lab with Hatchet and Vagabond
    • Recover Neuron's notes
    • 2 trigger devices to destroy
    • Take down Interrogator Crichton

You've got Neuron's notes!

Vagabond and Hatchet

Enemies

Badge DefeatPPD.png Praetorian Police Department

Notable NPCs


Hatchet and Vagabond Dialogue 

At Entrance:

Hatchet: I'm ready for the fight. Let's get moving.

Upon Finding Neuron's Notes:

Vagabond: Good goin, kiddo, that's what we needed!

Upon Reaching Final Room:

Hatchet: Too bad Marty isn't here to see this.

Upon Defeat:

Hatchet: I'm not dyin' here, I'll see you all back in the underground.
Vagabond: I'm pullin' back, kiddo!


V archetypeicon stalker.png Ambush! You will be ambushed by multiple waves of PPD throughout this mission.


PPD Ambush Dialogue 

PPD Trooper: We've got intruders, alert all nearby PPD!


PPD Trooper: We've got strict orders from Neuron, nobody gets in!


PPD Dialogue 

Before Combat:

PPD Enforcer: Guard this at all costs!

Combat Start:

PPD Enforcer: Activate the device, we need to get everyone down here!

You found Neuron's notes on the disease!

Icon clue generic.png
Neuron's Notes
You found what must be all of Neuron's notes regarding the disease he injected into the Resistance fighters. Wardog will probably be able to figure out what these notes mean, along with how to use them.
Interrogator Crichton Dialogue 

Before Combat:

Interrogator Crichton: This is an absolute mess! Get everything in order!

Combat Start:

Interrogator Crichton: So you're all to blame, are you? You're not getting away!


Debriefing

Good job, kiddo. Well, Character. Yeah, I got your name in my head now, I ain't gonna forget it. You and me, we served together, officially.

Wardog said the notes detail how to trigger the disease in them boys. He said it's gonna help bring his big plan to completion, or somethin'. I don't really know what it is yet, but it appears you're gonna know real soon. He wants ya to help him see this big plan to the end.