Missile Launch Mission
Overview
Missile Launch! is a mission that takes place in the Warburg PvP zone in City of Heroes and City of Villains.
If you successfully complete it, you will receive one of three temporary powers: Chemical Burn, Biological Mutagens, or Nuclear Blast.
Description
Warburg has an underground missile plant that can launch nuclear, chemical and biological weapons. The situation with Marshal Blitz and his Rogue Arachnos gives you the chance to get in and take control of one of these missiles. However, it won't be easy.
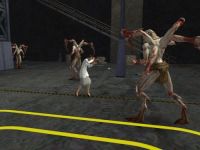
The launch key has been divided into three code fragments, each in the possession of a different scientist. Intel tells us these men are trapped in the production facility underneath Warburg. You'll have to find each scientist and guide him to the surface. (Click on the scientist to tell him to follow you or stay put.) I'm sure he will give up his section of the launch code.
Once you have all three pieces, go back down and find the computer that launches the missile you want. The codes generate a launch key. If you can get that to the firing bunker on the surface, you can launch your payload. This gives you a temp power that you can use at any time in the game. There are three types of payloads, each of which gives a different temp power. You can have one of each temp power at any given time.
Geography

The Web is a complex system of underground tunnels. At first, navigating these tunnels may prove difficult.
The complex is split up into three primary chambers. Each of these chambers is labelled with a number: 1, 2, or 3. Within the tunnels, there are signs posted indicating which passages lead to or open into a numbered chamber. There are also red Exit signs that indicate the shortest passage that leads out of the chamber.
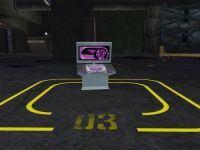
Chamber 1 contains the nuclear launch computer (02), and the shortest exit passage out of the chamber is the blue lighted western tunnel that exits southwest of the Warburg marker, nearest the Hero Base. Chamber 2 contains the biological launch computer (01), and the shortest exit passage out of the chamber is the red lighted northwestern tunnel that exits north of the Warburg marker, nearest the Villain Base. Chamber 3 contains the chemical launch computer (03), and the shortest exit passage out of the chamber is the white lighted eastern tunnel that exits far east of the Warburg marker, almost into the water, nearest the launching platform.
The tunnels are all linked together. This may be very helpful when attempting to lead a scientist to his or her research bunker since, depending on a hero's or villain's strengths, it may be much safer to travel underground and to find an exit close to the research bunker than it is to travel aboveground. If Warburg happens to be crowded, it may be to your advantage to take a longer route through the tunnel that exits closer to your faction's base, even if the total distance is longer.
The Step-by-Step
Important Notes
First of all, players need to realize that Warburg, the zone where the Missile Launch mission takes place, is a very dangerous place. It is a PvP zone, which means that you will be fighting not only the local denizens, but other heroes and villains as well. It is literally a free-for-all, and there are player killers (PK'ers) that hang out at vital areas to complete this mission.
Worse, many of these PK'ers are able to one-shot almost any character of any archetype. And yes, these PK'ers tend to team up and kill anyone that comes near their group, and they will taunt you in the global chat channel. If you have a thin skin, you would do well to avoid this zone, as you will never be able to complete this mission for arguing in the global chat channel with other people.
Soloing this mission is very difficult because the zone is all players versus all players, including heroes versus heroes and villains versus villains. In other words, if you are attempting to solo this mission, you will be effectively competing against every other player in the zone.
That being said, here is how one completes this mission in spite of the chaos that goes on in this zone.
Rescue a lab technician

The first step to completing this mission is to rescue a lab technician from his or her guarding Arachnoids. The lab technicians are located in The WEB, a missile plant directly underneath the Warburg neighborhood marker. There are three entrances into this plant, and they are all connected by a sublevel. Note that you can only rescue one lab technician at a time.
After defeating the Arachnoids defending a lab technician, you must click on him or her and instruct the technician to follow you. After rescuing a lab technician, you must lead him or her to the appropriate bunker before rescuing another technician.
Lead the technician to his or her base
After rescuing a lab technician you must lead him or her to his or her research bunker. The bunker will be marked on your map with an orange dot labelled "Bunker." The bunkers are outside the underground plant in various locations around Warburg. The bunker is an Arachnos base-type door, and though it is usually guarded by Arachnos soldiers, it is not necessary to defeat the soldiers to rescue the lab technician. All that is required is to lead the technician to the door.
Note that if you are defeated while leading a lab technician to a bunker, the lab technician will stand in place for a minute, where he or she may be "stolen" by another hero or villain or until you are able to return to that location. You may also instruct a lab technician to stop following you by clicking on him or her.
Receiving the code parts
After you successfully lead a lab technician to his or her research bunker, you will receive a launch code. At this time, you must repeat the process of rescuing a lab technician and leading the technician to his or her bunker three times in all. The launch codes retrieved are issued in order and called Code 1, Code 2, and Code 3.
| Lab Technician: Thank goodness! Look, I may be Arachnos, but I'm not ungrateful. Here's my portion of the launch code. It takes three pieces to activate the launch key. |

If you get defeated by another player while you have one or more launch codes, that other player will get one code. Likewise, if you defeat another player who has one or more launch codes and you have fewer than three, you will obtain a code from that player.
The Access Bypass Salvage that is awarded as part of the Break In/Smash and Grab side mission in a Mayhem Mission or Safeguard Mission can be substituted for one of the launch codes.
Enter codes into launch computer
After retrieving the three codes, you will see the following message:

You must enter your launch codes into a launch computer. The launch computers are located in the sublevel of The WEB and are marked on the map as Biological Payload, Chemical Payload, and Nuclear Payload. The launch computer you use determines which temporary power you receive for firing the missile into orbit.
| Computer | Location | Nearest Exit | Temporary Power | Power Effects |
|---|---|---|---|---|
| Biological Payload (01) | Chamber 2 | Red Tunnel | PBAoE, Ally +Regeneration, +Dam | |
| Nuclear Payload (02) | Chamber 1 | Blue Tunnel | Ranged AoE, Extreme DoT(Energy),
Foe -End, -Recovery | |
| Chemical Payload (03) | Chamber 3 | White Tunnel | Ranged AoE Foe -Res(All), -DEF |
Once you have the firing code, if you get defeated by another player, you will lose one of the launch codes and will be left with the remaining two codes, and you will have to acquire another code by rescuing a lab technician and re-enter the new complete set into a payload computer again.
Fire the missile into orbit
Once you obtain the firing code from the launch computer, you will see the following message:
| You have acquired a launch key for the chemical device. You have 5 minutes to launch the rocket. Have a nice day. |

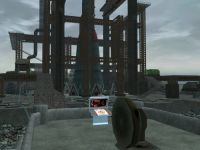
After getting your launch key by using a launch computer, you must use the firing console to actually launch the missile. The firing console is located just west of the missile silo at coordinates (-529, 28, -81), which is due east of the Warburg neighborhood marker in the center of the map.
Be careful, because the firing console is a popular camping spot for player killers (PK'ers), and it takes a few seconds to use the launch key, a few seconds during which you may be visible and vulnerable. If possible, you should use whatever means is at your disposal to boost your defense while entering the firing code.
Once the missile is launched, you will receive your temporary power. A hero or villain may have up to one of each of the three types in his or her arsenal at any given time.
Notes
- Unlike most hostages or rescue victims, lab technicians will follow a hero or villain even if he or she is invisible or otherwise stealthed, and enemies will not attack lab technicians.
- If you click on a lab technician that is following another player, the lab technician will tell you that he or she is following someone else, and you will not be able to get the lab technician to follow you unless you defeat the other player or the other player instructs the lab technician to stop following him or her.
- You may only have one of each type of temporary powers at a time. However, you may have all three of the three types of temporary powers (i.e. one each) simultaneously. To do this, make sure you use a different launch computer each time.
- If you possess one or more launch codes and are defeated by another player, you will lose one of your launch codes. If you are defeated by an NPC enemy, you will not lose a code.
- If you have all 3 Temporary Missile powers, and you face off a AV/GM, this order is recommended for maximum effect:
- Biological Mutagens - To buff the oncoming nuke
- Chemical Burn - So the AV/GM won't resist or dodge the oncoming nuke
- Nuclear Blast - Gives the target massive amounts of damage
Badge
| Rocketman Supergroups everywhere quake in fear when you enter Warburg. You've launched the Warburg Rocket ten times. |
External Links
- VidiotMaps game map of Warburg with passages and launch computers marked