Mission Architect Unique Maps: Difference between revisions
Jump to navigation
Jump to search
imported>Scuzzbopper m →Unique: +img: Midnight Club & pawn shops |
imported>Heraclea |
||
| (33 intermediate revisions by 3 users not shown) | |||
| Line 1: | Line 1: | ||
{{ | {{TOCright}} | ||
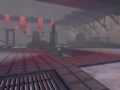
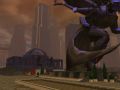
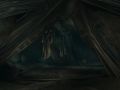
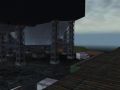
== Overview == | == Overview == | ||
| Line 22: | Line 20: | ||
Image:MIWidowTower01.jpg|{{center|Widow Tower}} | Image:MIWidowTower01.jpg|{{center|Widow Tower}} | ||
</gallery> | </gallery> | ||
'''Notes & Comments:''' | |||
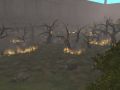
* ''Mercy Island - Landing Pad'': It is always night on this map, regardless of the in-game time of day. | |||
* ''Mercy Island - Widow Tower'': Currently, this is the same map as ''Widow Tower'' | |||
* ''Widow Tower'': Currently, this is the same map as ''Mercy Island - Widow Tower'' | |||
'''Unlockables:''' | |||
* ''Cave - Arachnoid Cocoon'': Additional Cave Maps | |||
{{clr}} | |||
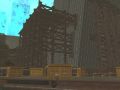
=== Atlas Park === | === Atlas Park === | ||
| Line 30: | Line 35: | ||
Image:AtlasShivan01.jpg|{{center|Atlas Park 02}} | Image:AtlasShivan01.jpg|{{center|Atlas Park 02}} | ||
</gallery> | </gallery> | ||
'''Notes & Comments:''' | |||
* ''Atlas Park (Runied)'': There is no overhead map display for this map. | |||
* ''Atlas Park 01'': This map includes an Arachnos flyer used as the mission entrance/door. There are also cars traveling the streets and pedestrians on this map. | |||
* ''Atlas Park 02'': This map includes a destroyable meteor in a crater. There is no way to make the meteor a mission goal. The door is an Ouroboros crystal. | |||
{{clr}} | |||
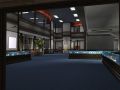
=== Banks === | === Banks === | ||
<gallery> | <gallery> | ||
Image: | Image:22ndNationalBank_Gen.jpg|{{center|22nd National Bank 01}} | ||
Image: | Image:22ndNationalBank_Gen.jpg|{{center|22nd National Bank 02}} | ||
Image: | Image:22ndNationalBank_Gen.jpg|{{center|22nd National Bank 03}} | ||
Image: | Image:22ndNationalBank_Gen.jpg|{{center|22nd National Bank 04}} | ||
Image: | Image:22ndNationalBank_Gen.jpg|{{center|22nd National Bank 05}} | ||
Image: | Image:22ndNationalBank_Gen.jpg|{{center|22nd National Bank 06}} | ||
Image: | Image:22ndNationalBank_Gen.jpg|{{center|22nd National Bank 07}} | ||
Image: | Image:22ndNationalBank_Gen.jpg|{{center|22nd National Bank 08}} | ||
Image: | Image:BankExchange01.jpg|{{center|Bank Exchange 01}} | ||
Image: | Image:BankExchange02.jpg|{{center|Bank Exchange 02}} | ||
Image: | Image:BankExchange03.jpg|{{center|Bank Exchange 03}} | ||
Image: | Image:FirstNational01.jpg|{{center|First National Bank 01}} | ||
Image: | Image:FirstNational02.jpg|{{center|First National Bank 02}} | ||
Image: | Image:FirstNational03.jpg|{{center|First National Bank 03}} | ||
Image: | Image:LSSL08.jpg|{{center|Long Shot Savings & Loan 01}} | ||
Image: | Image:LSSL08.jpg|{{center|Long Shot Savings & Loan 02}} | ||
Image: | Image:LSSL08.jpg|{{center|Long Shot Savings & Loan 03}} | ||
Image: | Image:LSSL08.jpg|{{center|Long Shot Savings & Loan 04}} | ||
Image: | Image:LSSL08.jpg|{{center|Long Shot Savings & Loan 05}} | ||
Image: | Image:LSSL08.jpg|{{center|Long Shot Savings & Loan 06}} | ||
Image: | Image:LSSL08.jpg|{{center|Long Shot Savings & Loan 07}} | ||
Image: | Image:LSSL08.jpg|{{center|Long Shot Savings & Loan 08}} | ||
</gallery> | </gallery> | ||
'''Notes & Comments:''' | |||
* ''22nd National Bank'' (all): Apart from the placement of doors and hallways, the visual elements of the 22nd National Bank maps do not change significantly from one map to the next. | |||
* ''Long Shot Savings & Loan'' (all): Apart from the placement of doors and hallways, the visual elements of the Long Shot Savings & Loan maps do not change significantly from one map to the next. | |||
'''Unlockables:''' | |||
* ''22nd National Bank (02 - 08)'': Additional Bank Maps | |||
* ''Bank Exchange (02 - 03)'': Additional Bank Maps | |||
* ''First National Bank (02 - 03)'': Additional Bank Maps | |||
* ''Long Shot Savings & Loan (02 - 08)'': Additional Bank Maps | |||
{{clr}} | |||
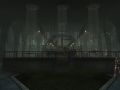
=== Cap Au Diable === | === Cap Au Diable === | ||
| Line 63: | Line 83: | ||
Image:CAPWSPDR01.jpg|{{center|Cap Au Diable - WSPDR Building}} | Image:CAPWSPDR01.jpg|{{center|Cap Au Diable - WSPDR Building}} | ||
</gallery> | </gallery> | ||
{{clr}} | |||
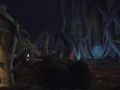
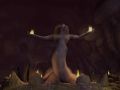
=== Caves (Unique) === | === Caves (Unique) === | ||
| Line 86: | Line 107: | ||
Image:WitchsLair01.jpg|{{center|Witch's Lair}} | Image:WitchsLair01.jpg|{{center|Witch's Lair}} | ||
</gallery> | </gallery> | ||
'''Notes & Comments:''' | |||
* ''Council - Radar Room 01'': This is a very small map consisting of a single room typical of the standard Council map set. | |||
* ''Council - Radar Room 02'': This is a very small map consisting of a single room typical of the standard Council map set. | |||
'''Unlockables:''' | |||
* ''5th Column Head Quarters'': Additional Cave Maps | |||
* ''Banished Pantheon'': Additional Cave Maps | |||
* ''Cave - Arachnoid Cocoon'': Additional Cave Maps | |||
* ''Cave of Shaper'': Additional Cave Maps | |||
* ''Cimeroran Tombs'': Additional Cave Maps | |||
* ''Council - Giant Robot 01'': Additional Cave Maps | |||
* ''Council - Giant Robot 03'': Unique Council Maps | |||
* ''Council - Radar Room 01'': Additional Cave Maps | |||
* ''Council - Radar Room 02'': Unique Council Maps | |||
* ''Infernal's Lair'': Additional Cave Maps | |||
* ''Nerva Isle Respec'': Additional Cave Maps | |||
* ''Orenbega'': Additional Cave Maps | |||
* ''Snake Cave (with Idol)'': Additional Cave Maps | |||
* ''Snake Cave - Hatchery'': Additional Cave Maps | |||
* ''Snake Cave - Sthenos' Lair'': Additional Cave Maps | |||
* ''Snake Cave 01'': Additional Cave Maps | |||
* ''Snake Cave 02'': Additional Cave Maps | |||
* ''Trolls'': Additional Cave Maps | |||
* ''Witch's Lair'': Additional Cave Maps | |||
{{clr}} | |||
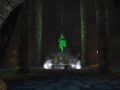
=== Council & 5th Column === | === Council & 5th Column === | ||
| Line 98: | Line 144: | ||
Image:CenterDangerRoom01.jpg|{{center|The Centers Danger Room}} | Image:CenterDangerRoom01.jpg|{{center|The Centers Danger Room}} | ||
</gallery> | </gallery> | ||
'''Notes & Comments:''' | |||
* ''Council - Radar Room 01'': This is a very small map consisting of a single room typical of the standard Council map set. | |||
* ''Council - Radar Room 02'': This is a very small map consisting of a single room typical of the standard Council map set. | |||
'''Unlockables:''' | |||
* ''Council - Giant Robot 01'': Additional Cave Maps | |||
* ''Council - Giant Robot 03'': Unique Council Maps | |||
* ''Council - Radar Room 01'': Additional Cave Maps | |||
* ''Council - Radar Room 02'': Unique Council Maps | |||
{{clr}} | |||
=== Casino === | === Casino === | ||
| Line 109: | Line 165: | ||
Image:Casino1.jpg|{{center|Tiki}} | Image:Casino1.jpg|{{center|Tiki}} | ||
</gallery> | </gallery> | ||
'''Unlockables:''' | |||
* ''Longbow Officer's Club'': Pawn Shops, Casinos and Police Stations | |||
* ''Speakeasy'': Pawn Shops, Casinos and Police Stations | |||
* ''Tiki'': Pawn Shops, Casinos and Police Stations | |||
{{clr}} | |||
=== Circle of Thorns === | === Circle of Thorns === | ||
| Line 118: | Line 179: | ||
</gallery> | </gallery> | ||
<!-- By appearance Vaults & Spirit seem like maybe they should be reversed, but I double-checked that that's how they're labeled. -ScuzzB --> | <!-- By appearance Vaults & Spirit seem like maybe they should be reversed, but I double-checked that that's how they're labeled. -ScuzzB --> | ||
'''Unlockables:''' | |||
* ''Circle of Thorns - Orenbega'': Additional Cave Maps | |||
* ''Circle of Thorns - Vaults of Mu'': Unique Circle of Thorns Maps | |||
* ''Thorn Tree 02'': Unique Circle of Thorns Maps | |||
{{clr}} | |||
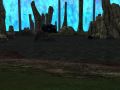
=== Croatoa === | === Croatoa === | ||
<gallery> | <gallery> | ||
Image: | Image:MACroatoa01.jpg|{{center|Croatoa 01}} | ||
Image: | Image:MACroatoa02.jpg|{{center|Croatoa 02}} | ||
Image:SalamancaHenges1.jpg|{{center|Croatoa 03}} | Image:SalamancaHenges1.jpg|{{center|Croatoa 03}} | ||
Image: | Image:MACroatoa04.jpg|{{center|Croatoa 04}} | ||
Image: | Image:MACroatoa05.jpg|{{center|Croatoa 05}} | ||
Image: | Image:MACroatoa06.jpg|{{center|Croatoa 06}} | ||
Image: | Image:MACroatoa07.jpg|{{center|Croatoa 07}} | ||
Image: | Image:MACroatoa08.jpg|{{center|Croatoa 08}} | ||
Image: | Image:MACroatoa09.jpg|{{center|Croatoa 09}} | ||
</gallery> | </gallery> | ||
'''Unlockables:''' | |||
* ''Croatoa (05 - 09)'': Special Outdoor Croatoa Maps | |||
{{clr}} | |||
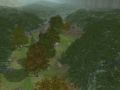
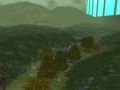
=== Outdoor Maps === | === Outdoor Maps === | ||
| Line 166: | Line 235: | ||
Image:WarburgMaltaBAse01.jpg|{{center|Warburg Malta Base}} | Image:WarburgMaltaBAse01.jpg|{{center|Warburg Malta Base}} | ||
</gallery> | </gallery> | ||
'''Notes & Comments:''' | |||
* ''Atlas Park (Runied)'': There is no overhead map display for this map. | |||
* ''Atlas Park 01'': This map includes an Arachnos flyer used as the mission entrance/door. There are also cars traveling the streets and pedestrians on this map. | |||
* ''Forest (Burning)'': Removed as of 5/5/2009 patch. Future disposition unknown. | |||
* ''Mercy Island - Landing Pad'': It is always night on this map, regardless of the in-game time of day. | |||
* ''Warburg Malta Base'': This is an indoor/outdoor combination map. | |||
'''Unlockables:''' | |||
* ''City Map 02'': Special Outdoor Maps | |||
* ''City Map 02 (Industrial)'': Special Outdoor Maps | |||
* ''City Map 02 (Ruined)'': Special Outdoor Maps | |||
* ''City Map 03'': Special Outdoor Maps | |||
* ''Forest 02'':Special Outdoor Maps | |||
* ''Forest 03'': Special Outdoor Maps | |||
* ''Graveyard 02'': Special Outdoor Maps | |||
{{clr}} | |||
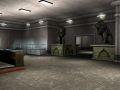
=== Office === | === Office === | ||
| Line 173: | Line 258: | ||
Image:Asylum01.jpg|{{center|Mayhem's Hospital}} | Image:Asylum01.jpg|{{center|Mayhem's Hospital}} | ||
Image:OfficeToRiktiCave.jpg|{{center|Office to Rikti Caves 01}} | Image:OfficeToRiktiCave.jpg|{{center|Office to Rikti Caves 01}} | ||
Image:OfficeToRiktiCave.jpg|{{center|Office to Rikti Caves 02}} | Image:OfficeToRiktiCave.jpg|{{center|Office to Rikti Caves 02}} | ||
Image:OfficeToRiktiCave.jpg|{{center|Office to Rikti Caves 03}} | Image:OfficeToRiktiCave.jpg|{{center|Office to Rikti Caves 03}} | ||
Image:SkullsOffice01.jpg|{{center|Skulls}} | Image:SkullsOffice01.jpg|{{center|Skulls}} | ||
</gallery> | </gallery> | ||
'''Notes & Comments:''' | |||
* ''Office to Rikti Caves'' (all): Apart from the general layout, the visual elements of the Office to Rikti Caves maps are largely similar, and the transitional area appears identical for all three. | |||
'''Unlockables:''' | |||
* ''Office to Rikti Caves (02 - 03)'': Additional Special Cave Maps | |||
{{clr}} | |||
=== Mercy Island === | === Mercy Island === | ||
| Line 185: | Line 276: | ||
Image:MIWidowTower01.jpg|{{center|Mercy Island - Widow Tower}} | Image:MIWidowTower01.jpg|{{center|Mercy Island - Widow Tower}} | ||
</gallery> | </gallery> | ||
'''Notes & Comments:''' | |||
* ''Mercy Island - Landing Pad'': It is always night on this map, regardless of the in-game time of day. | |||
{{clr}} | |||
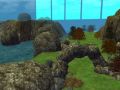
=== Nerva Archipelago === | === Nerva Archipelago === | ||
| Line 192: | Line 286: | ||
Image:ThornIsle1.jpg|{{center|Thorn Tree 02}} | Image:ThornIsle1.jpg|{{center|Thorn Tree 02}} | ||
</gallery> | </gallery> | ||
'''Unlockables:''' | |||
* ''Thorn Tree 02'': Unique Circle of Thorns Maps | |||
{{clr}} | |||
=== Rikti War Zone === | === Rikti War Zone === | ||
| Line 197: | Line 294: | ||
Image:RWZLittleRoundTop01.jpg|{{center|Little Round Top}} | Image:RWZLittleRoundTop01.jpg|{{center|Little Round Top}} | ||
Image:OfficeToRiktiCave.jpg|{{center|Office to Rikti Caves 01}} | Image:OfficeToRiktiCave.jpg|{{center|Office to Rikti Caves 01}} | ||
Image:OfficeToRiktiCave.jpg|{{center|Office to Rikti Caves 02}} | Image:OfficeToRiktiCave.jpg|{{center|Office to Rikti Caves 02}} | ||
Image:OfficeToRiktiCave.jpg|{{center|Office to Rikti Caves 03}} | Image:OfficeToRiktiCave.jpg|{{center|Office to Rikti Caves 03}} | ||
Image:UnderMothership1.jpg|{{center|Portal Cavern}} | Image:UnderMothership1.jpg|{{center|Portal Cavern}} | ||
Image:RWZTheBulge01.jpg|{{center|The Bulge}} | Image:RWZTheBulge01.jpg|{{center|The Bulge}} | ||
Image:RWZTheSeer01.jpg|{{center|The Seer}} | Image:RWZTheSeer01.jpg|{{center|The Seer}} | ||
</gallery> | </gallery> | ||
'''Notes & Comments:''' | |||
* ''Office to Rikti Caves'' (all): Apart from the general layout, the visual elements of the Office to Rikti Caves maps are largely similar, and the transitional area appears identical for all three. | |||
'''Unlockables:''' | |||
* ''Office to Rikti Caves (02 - 03)'': Additional Special Cave Maps | |||
{{clr}} | |||
=== Snake Maps === | === Snake Maps === | ||
| Line 213: | Line 316: | ||
Image:SnakeCave02.jpg|{{center|Snake Cave 02}} | Image:SnakeCave02.jpg|{{center|Snake Cave 02}} | ||
</gallery> | </gallery> | ||
'''Unlockables:''' | |||
* ''Snake Cave (with Idol)'': Additional Cave Maps | |||
* ''Snake Cave - Hatchery'': Additional Cave Maps | |||
* ''Snake Cave - Sthenos' Lair'': Additional Cave Maps | |||
* ''Snake Cave 01'': Additional Cave Maps | |||
* ''Snake Cave 02'': Additional Cave Maps | |||
{{clr}} | |||
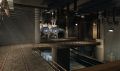
=== Tech Lab === | === Tech Lab === | ||
| Line 225: | Line 335: | ||
Image:VilTutorialBunker01.jpg|{{center|Villain Tutorial Bunker}} | Image:VilTutorialBunker01.jpg|{{center|Villain Tutorial Bunker}} | ||
</gallery> | </gallery> | ||
'''Notes & Comments:''' | |||
* ''Crey Hero Lab'': Removed as of 5/5/2009 patch. Future disposition unknown. | |||
'''Unlockables:''' | |||
* ''Abandoned Tech (02 - 04)'': Additional Tech Maps | |||
* ''Portal Corp 02'': Additional Tech Maps | |||
{{clr}} | |||
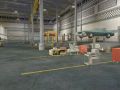
=== Warehouse === | === Warehouse === | ||
| Line 236: | Line 353: | ||
Image:LouShop1.jpg|{{center|Lou's Garage}} | Image:LouShop1.jpg|{{center|Lou's Garage}} | ||
</gallery> | </gallery> | ||
{{clr}} | |||
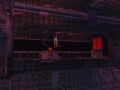
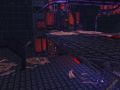
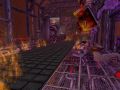
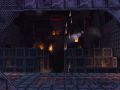
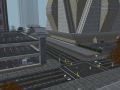
=== Unique === | === Unique === | ||
| Line 246: | Line 364: | ||
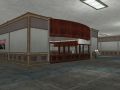
Image:MAPawnShop01.jpg|{{center|Pawn Shop 01}} | Image:MAPawnShop01.jpg|{{center|Pawn Shop 01}} | ||
Image:MAPawnShop02.jpg|{{center|Pawn Shop 02}} | Image:MAPawnShop02.jpg|{{center|Pawn Shop 02}} | ||
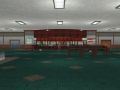
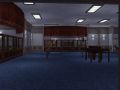
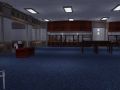
Image: | Image:PoliceStation01.jpg|{{center|Police Station 01}} | ||
Image: | Image:PoliceStation02.jpg|{{center|Police Station 02}} | ||
Image: | Image:RuladakCave01.jpg|{{center|Ruladak Cave}} | ||
Image:HardWay1.jpg|{{center|St. Martial - The Flush}} | Image:HardWay1.jpg|{{center|St. Martial - The Flush}} | ||
Image:CenterDangerRoom01.jpg|{{center|The Centers Danger Room}} | Image:CenterDangerRoom01.jpg|{{center|The Centers Danger Room}} | ||
Image: | Image:MAZigBreakout01.jpg|{{center|The Zig Breakout}} <!-- Map is always night --> | ||
Image: | Image:InventionTutorial01.jpg|{{center|University Basement}} | ||
Image:VilTutorialBunker01.jpg|{{center|Villain Tutorial Bunker}} | Image:VilTutorialBunker01.jpg|{{center|Villain Tutorial Bunker}} | ||
Image:MIWidowTower01.jpg|{{center|Widow Tower}} | Image:MIWidowTower01.jpg|{{center|Widow Tower}} | ||
</gallery> | </gallery> | ||
'''Notes & Comments:''' | |||
* ''The Zig Breakout'': It is always night on this map, regardless of the in-game time of day. The map contains an indoor and an outdoor portion; the indoor portion is accessed through the sewer entrance on the northwest side of the map. | |||
'''Unlockables:''' | |||
* ''Jewelry Shop 02'': Pawn Shops, Casinos and Police Stations | |||
* ''Pawn Shop 02'': Pawn Shops, Casinos and Police Stations | |||
* ''Police Station 02'': Pawn Shops, Casinos and Police Stations | |||
{{clr}} | |||
[[Category:Mission Architect]] | [[Category:Mission Architect]] | ||
Latest revision as of 12:39, 5 June 2009
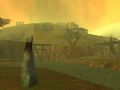
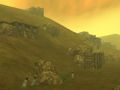
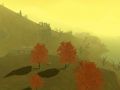
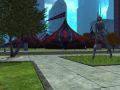
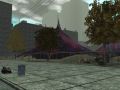
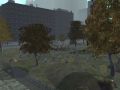
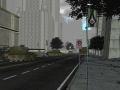
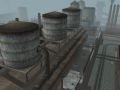
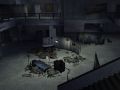
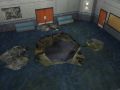
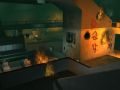
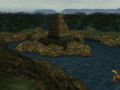
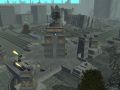
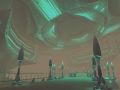
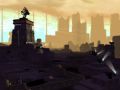
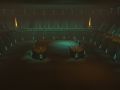
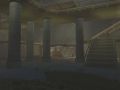
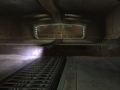
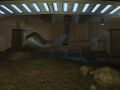
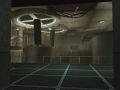
Overview
This page provides a visual list, by means of in-game screenshots, of all Mission Architect map categories belonging to the Unique Maps Map Type.
Unique Maps Categories
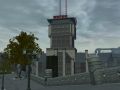
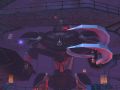
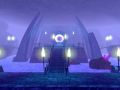
Arachnos
-
 Arachnos Arachnoid Lab
 -
 Arachnos Base (Snake Infested)
 -
 Arachnos Base On Fire
 -
 Arachnos Storage On Fire
 -
 Arachnos Submarine Base
 -
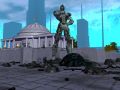
 Atlas Park (Arachnos)
 -
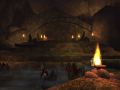
 Cave - Arachnoid Cocoon
 -
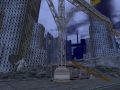
 Mercy Island - Factory
 -
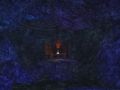
 Mercy Island - Landing Pad
 -
 Mercy Island - Widow Tower
 -
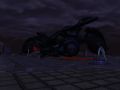
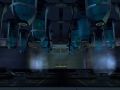
Widow Tower


Notes & Comments:
- Mercy Island - Landing Pad: It is always night on this map, regardless of the in-game time of day.
- Mercy Island - Widow Tower: Currently, this is the same map as Widow Tower
- Widow Tower: Currently, this is the same map as Mercy Island - Widow Tower
Unlockables:
- Cave - Arachnoid Cocoon: Additional Cave Maps
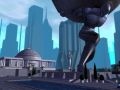
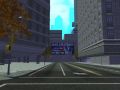
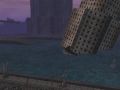
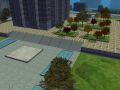
Atlas Park
-
 Atlas Park (Ruined)
 -
 Atlas Park 01
 -
 Atlas Park 02


Notes & Comments:
- Atlas Park (Runied): There is no overhead map display for this map.
- Atlas Park 01: This map includes an Arachnos flyer used as the mission entrance/door. There are also cars traveling the streets and pedestrians on this map.
- Atlas Park 02: This map includes a destroyable meteor in a crater. There is no way to make the meteor a mission goal. The door is an Ouroboros crystal.
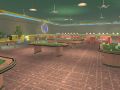
Banks
-
 22nd National Bank 01
 -
22nd National Bank 02
-
22nd National Bank 03
-
22nd National Bank 04
-
22nd National Bank 05
-
22nd National Bank 06
-
22nd National Bank 07
-
22nd National Bank 08
-
 Bank Exchange 01
 -
 Bank Exchange 02
 -
 Bank Exchange 03
 -
 First National Bank 01
 -
 First National Bank 02
 -
 First National Bank 03
 -
 Long Shot Savings & Loan 01
 -
Long Shot Savings & Loan 02
-
Long Shot Savings & Loan 03
-
Long Shot Savings & Loan 04
-
Long Shot Savings & Loan 05
-
Long Shot Savings & Loan 06
-
Long Shot Savings & Loan 07
-
Long Shot Savings & Loan 08


Notes & Comments:
- 22nd National Bank (all): Apart from the placement of doors and hallways, the visual elements of the 22nd National Bank maps do not change significantly from one map to the next.
- Long Shot Savings & Loan (all): Apart from the placement of doors and hallways, the visual elements of the Long Shot Savings & Loan maps do not change significantly from one map to the next.
Unlockables:
- 22nd National Bank (02 - 08): Additional Bank Maps
- Bank Exchange (02 - 03): Additional Bank Maps
- First National Bank (02 - 03): Additional Bank Maps
- Long Shot Savings & Loan (02 - 08): Additional Bank Maps
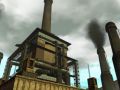
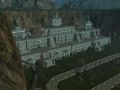
Cap Au Diable
-
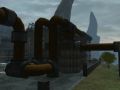 Cap Au Diable - Power Station
 -
 Cap Au Diable - PTS Control Bunker
 -
 Cap Au Diable - WSPDR Building


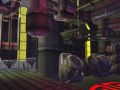
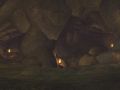
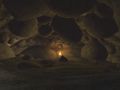
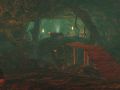
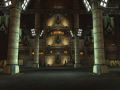
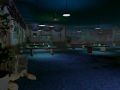
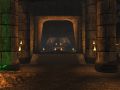
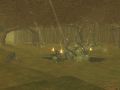
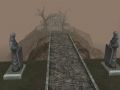
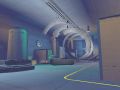
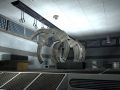
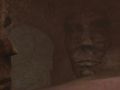
Caves (Unique)
-
 5th Column Head Quarters
 -
 Banished Pantheon
 -
Cave - Arachnoid Cocoon
-
 Cave of Shaper
 -
 Cimeroran Tombs
 -
 Council - Giant Robot 01
 -
 Council - Giant Robot 03
 -
 Council - Radar Room 01
 -
 Council - Radar Room 02
 -
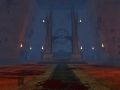 Infernal's Lair
 -
 Nerva Isle Respec
 -
 Orenbega
 -
 Snake Cave (with Idol)
 -
 Snake Cave - Hatchery
 -
 Snake Cave - Sthenos' Lair
 -
 Snake Cave 01
 -
 Snake Cave 02
 -
 Trolls
 -
 Witch's Lair


Notes & Comments:
- Council - Radar Room 01: This is a very small map consisting of a single room typical of the standard Council map set.
- Council - Radar Room 02: This is a very small map consisting of a single room typical of the standard Council map set.
Unlockables:
- 5th Column Head Quarters: Additional Cave Maps
- Banished Pantheon: Additional Cave Maps
- Cave - Arachnoid Cocoon: Additional Cave Maps
- Cave of Shaper: Additional Cave Maps
- Cimeroran Tombs: Additional Cave Maps
- Council - Giant Robot 01: Additional Cave Maps
- Council - Giant Robot 03: Unique Council Maps
- Council - Radar Room 01: Additional Cave Maps
- Council - Radar Room 02: Unique Council Maps
- Infernal's Lair: Additional Cave Maps
- Nerva Isle Respec: Additional Cave Maps
- Orenbega: Additional Cave Maps
- Snake Cave (with Idol): Additional Cave Maps
- Snake Cave - Hatchery: Additional Cave Maps
- Snake Cave - Sthenos' Lair: Additional Cave Maps
- Snake Cave 01: Additional Cave Maps
- Snake Cave 02: Additional Cave Maps
- Trolls: Additional Cave Maps
- Witch's Lair: Additional Cave Maps
Council & 5th Column
-
5th Column Head Quarters
-
 Council
 -
Council - Giant Robot 01
-
Council - Giant Robot 03
-
Council - Radar Room 01
-
Council - Radar Room 02
-
 Council Factory 01
 -
 The Centers Danger Room


Notes & Comments:
- Council - Radar Room 01: This is a very small map consisting of a single room typical of the standard Council map set.
- Council - Radar Room 02: This is a very small map consisting of a single room typical of the standard Council map set.
Unlockables:
- Council - Giant Robot 01: Additional Cave Maps
- Council - Giant Robot 03: Unique Council Maps
- Council - Radar Room 01: Additional Cave Maps
- Council - Radar Room 02: Unique Council Maps
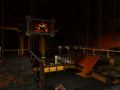
Casino
-
 Blackbeards
 -
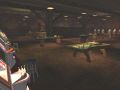 Chum Bucket
 -
 Hook & Anchor
 -
 Longbow Officer's Club
 -
 Lucky Six
 -
 Speakeasy
 -
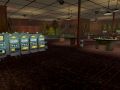 Tiki
Tiki


Unlockables:
- Longbow Officer's Club: Pawn Shops, Casinos and Police Stations
- Speakeasy: Pawn Shops, Casinos and Police Stations
- Tiki: Pawn Shops, Casinos and Police Stations
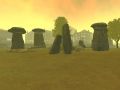
Circle of Thorns
-
Circle of Thorns - Orenbega
-
 Circle of Thorns - Spirit City
 -
 Circle of Thorns - Vaults of Mu
 -
 Thorn Tree 02


Unlockables:
- Circle of Thorns - Orenbega: Additional Cave Maps
- Circle of Thorns - Vaults of Mu: Unique Circle of Thorns Maps
- Thorn Tree 02: Unique Circle of Thorns Maps
Croatoa
-
 Croatoa 01
 -
 Croatoa 02
 -
 Croatoa 03
 -
 Croatoa 04
 -
 Croatoa 05
 -
 Croatoa 06
 -
 Croatoa 07
 -
 Croatoa 08
 -
 Croatoa 09


Unlockables:
- Croatoa (05 - 09): Special Outdoor Croatoa Maps
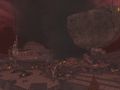
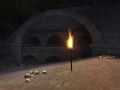
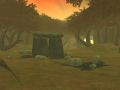
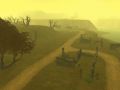
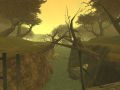
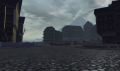
Outdoor Maps
-
Atlas Park (Arachnos)
-
Atlas Park (Ruined)
-
Atlas Park 01
-
Cap Au Diable - Power Station
-
Cap Au Diable - WSPDR Building
-
 Carnival of Shadows - Commercial
 -
 Carnival of Shadows - Residential
 -
 City Map 01
 -
 City Map 01 (Council)
 -
 City Map 01 (Industrial)
 -
 City Map 01 (Ruined)
 -
 City Map 02
 -
 City Map 02 (Industrial)
 -
 City Map 02 (Ruined)
 -
 City Map 03
 -
 Eden - Outdoor
 -
 Faultline - Damn Lies
 -
 Faultline - High Rise
 -
 Forest (Burning)
 -
 Forest 01
 -
 Forest 02
 -
 Forest 03
 -
 Graveyard 01
 -
 Graveyard 02
 -
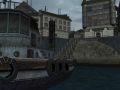 Mercy Island - Dock & Alley
 -
Mercy Island - Landing Pad
-
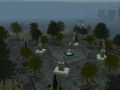 Nerva - Fountain Island
 -
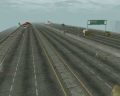 Skyway City - Blockade
 -
 St. Martial - The Flush
 -
 Steel Canyon
 -
 Warburg Malta Base


Notes & Comments:
- Atlas Park (Runied): There is no overhead map display for this map.
- Atlas Park 01: This map includes an Arachnos flyer used as the mission entrance/door. There are also cars traveling the streets and pedestrians on this map.
- Forest (Burning): Removed as of 5/5/2009 patch. Future disposition unknown.
- Mercy Island - Landing Pad: It is always night on this map, regardless of the in-game time of day.
- Warburg Malta Base: This is an indoor/outdoor combination map.
Unlockables:
- City Map 02: Special Outdoor Maps
- City Map 02 (Industrial): Special Outdoor Maps
- City Map 02 (Ruined): Special Outdoor Maps
- City Map 03: Special Outdoor Maps
- Forest 02:Special Outdoor Maps
- Forest 03: Special Outdoor Maps
- Graveyard 02: Special Outdoor Maps
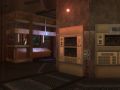
Office
-
 Green Fog
 -
 Hellions
 -
 Mayhem's Hospital
 -
 Office to Rikti Caves 01
 -
Office to Rikti Caves 02
-
Office to Rikti Caves 03
-
 Skulls


Notes & Comments:
- Office to Rikti Caves (all): Apart from the general layout, the visual elements of the Office to Rikti Caves maps are largely similar, and the transitional area appears identical for all three.
Unlockables:
- Office to Rikti Caves (02 - 03): Additional Special Cave Maps
Mercy Island
-
Mercy Island - Dock & Alley
-
Mercy Island - Factory
-
Mercy Island - Landing Pad
-
Mercy Island - Widow Tower
Notes & Comments:
- Mercy Island - Landing Pad: It is always night on this map, regardless of the in-game time of day.
Nerva Archipelago
-
Nerva - Fountain Island
-
 Nerva Primeva
 -
Thorn Tree 02

Unlockables:
- Thorn Tree 02: Unique Circle of Thorns Maps
Rikti War Zone
-
 Little Round Top
 -
Office to Rikti Caves 01
-
Office to Rikti Caves 02
-
Office to Rikti Caves 03
-
 Portal Cavern
 -
 The Bulge
 -
 The Seer


Notes & Comments:
- Office to Rikti Caves (all): Apart from the general layout, the visual elements of the Office to Rikti Caves maps are largely similar, and the transitional area appears identical for all three.
Unlockables:
- Office to Rikti Caves (02 - 03): Additional Special Cave Maps
Snake Maps
-
Arachnos Base - Snake Infested
-
Snake Cave (with Idol)
-
Snake Cave - Hatchery
-
Snake Cave - Sthenos' Lair
-
Snake Cave 01
-
Snake Cave 02
Unlockables:
- Snake Cave (with Idol): Additional Cave Maps
- Snake Cave - Hatchery: Additional Cave Maps
- Snake Cave - Sthenos' Lair: Additional Cave Maps
- Snake Cave 01: Additional Cave Maps
- Snake Cave 02: Additional Cave Maps
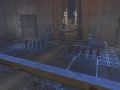
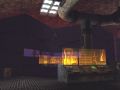
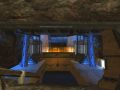
Tech Lab
-
 Abandoned Tech 01 (Small)
 -
 Abandoned Tech 02 (Small)
 -
 Abandoned Tech 03 (Small)
 -
 Abandoned Tech 04 (Small)
 -
 Crey Hero Lab
 -
 Portal Corp 01
 -
 Portal Corp 02
 -
 Villain Tutorial Bunker


Notes & Comments:
- Crey Hero Lab: Removed as of 5/5/2009 patch. Future disposition unknown.
Unlockables:
- Abandoned Tech (02 - 04): Additional Tech Maps
- Portal Corp 02: Additional Tech Maps
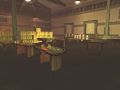
Warehouse
-
 Clockwork King's Lair
 -
Council
-
Council Factory 01
-
 Dance Rave
 -
 Freak-lympics
 -
 Freakshow
 -
 Lou's Garage


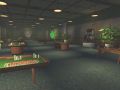
Unique
-
 Dr. Vahzilok's Lair
 -
Faultline
-
 Jewelry Shop 01
 -
 Jewelry Shop 02
 -
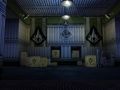
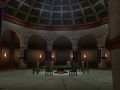 Midnighter Club
 -
 Pawn Shop 01
 -
 Pawn Shop 02
 -
 Police Station 01
 -
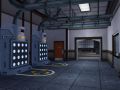 Police Station 02
 -
 Ruladak Cave
 -
St. Martial - The Flush
-
The Centers Danger Room
-
 The Zig Breakout
 -
 University Basement
 -
Villain Tutorial Bunker
-
Widow Tower


Notes & Comments:
- The Zig Breakout: It is always night on this map, regardless of the in-game time of day. The map contains an indoor and an outdoor portion; the indoor portion is accessed through the sewer entrance on the northwest side of the map.
Unlockables:
- Jewelry Shop 02: Pawn Shops, Casinos and Police Stations
- Pawn Shop 02: Pawn Shops, Casinos and Police Stations
- Police Station 02: Pawn Shops, Casinos and Police Stations